Sometimes you do not need multiple people actively working in the same Revit model. You just need a reliable way to share the current Revit file with consultants through the cloud — without setting up full Revit Cloud Worksharing or a BIM Collaborate Pro environment.
That is where Autodesk Desktop Connector can be useful.
This workflow does not replace Revit Cloud Worksharing. It does not create a live central model in the cloud, and it does not allow multiple Revit users to work in the same model at the same time. Autodesk identifies Revit Cloud Worksharing as requiring a Forma Design Collaboration license, formerly BIM Collaborate Pro.
Instead, this is a cloud file sharing workflow. You save a normal Revit project file into an Autodesk Docs / Forma project folder made available locally through Desktop Connector. Desktop Connector then syncs that file to the cloud project location.
Autodesk describes Desktop Connector as a way to connect desktop applications to cloud data sources. Files can be opened, edited, saved to the connector, and synced back to the cloud so project members can access the latest version.
The Basic Idea
Instead of starting a Revit Cloud Worksharing model, you create or save a standard Revit project file into a Desktop Connector project folder.
From there, Desktop Connector syncs the file to the Autodesk cloud project. Other project members with access can retrieve, download, link, or reference that file.
Think of it this way:
Those are very different workflows.
Step 1: Create or Access the Project in Autodesk Forma / Autodesk Docs
The project first needs to exist in Autodesk's cloud environment. In this example, the project is visible in the Autodesk Forma project admin interface.
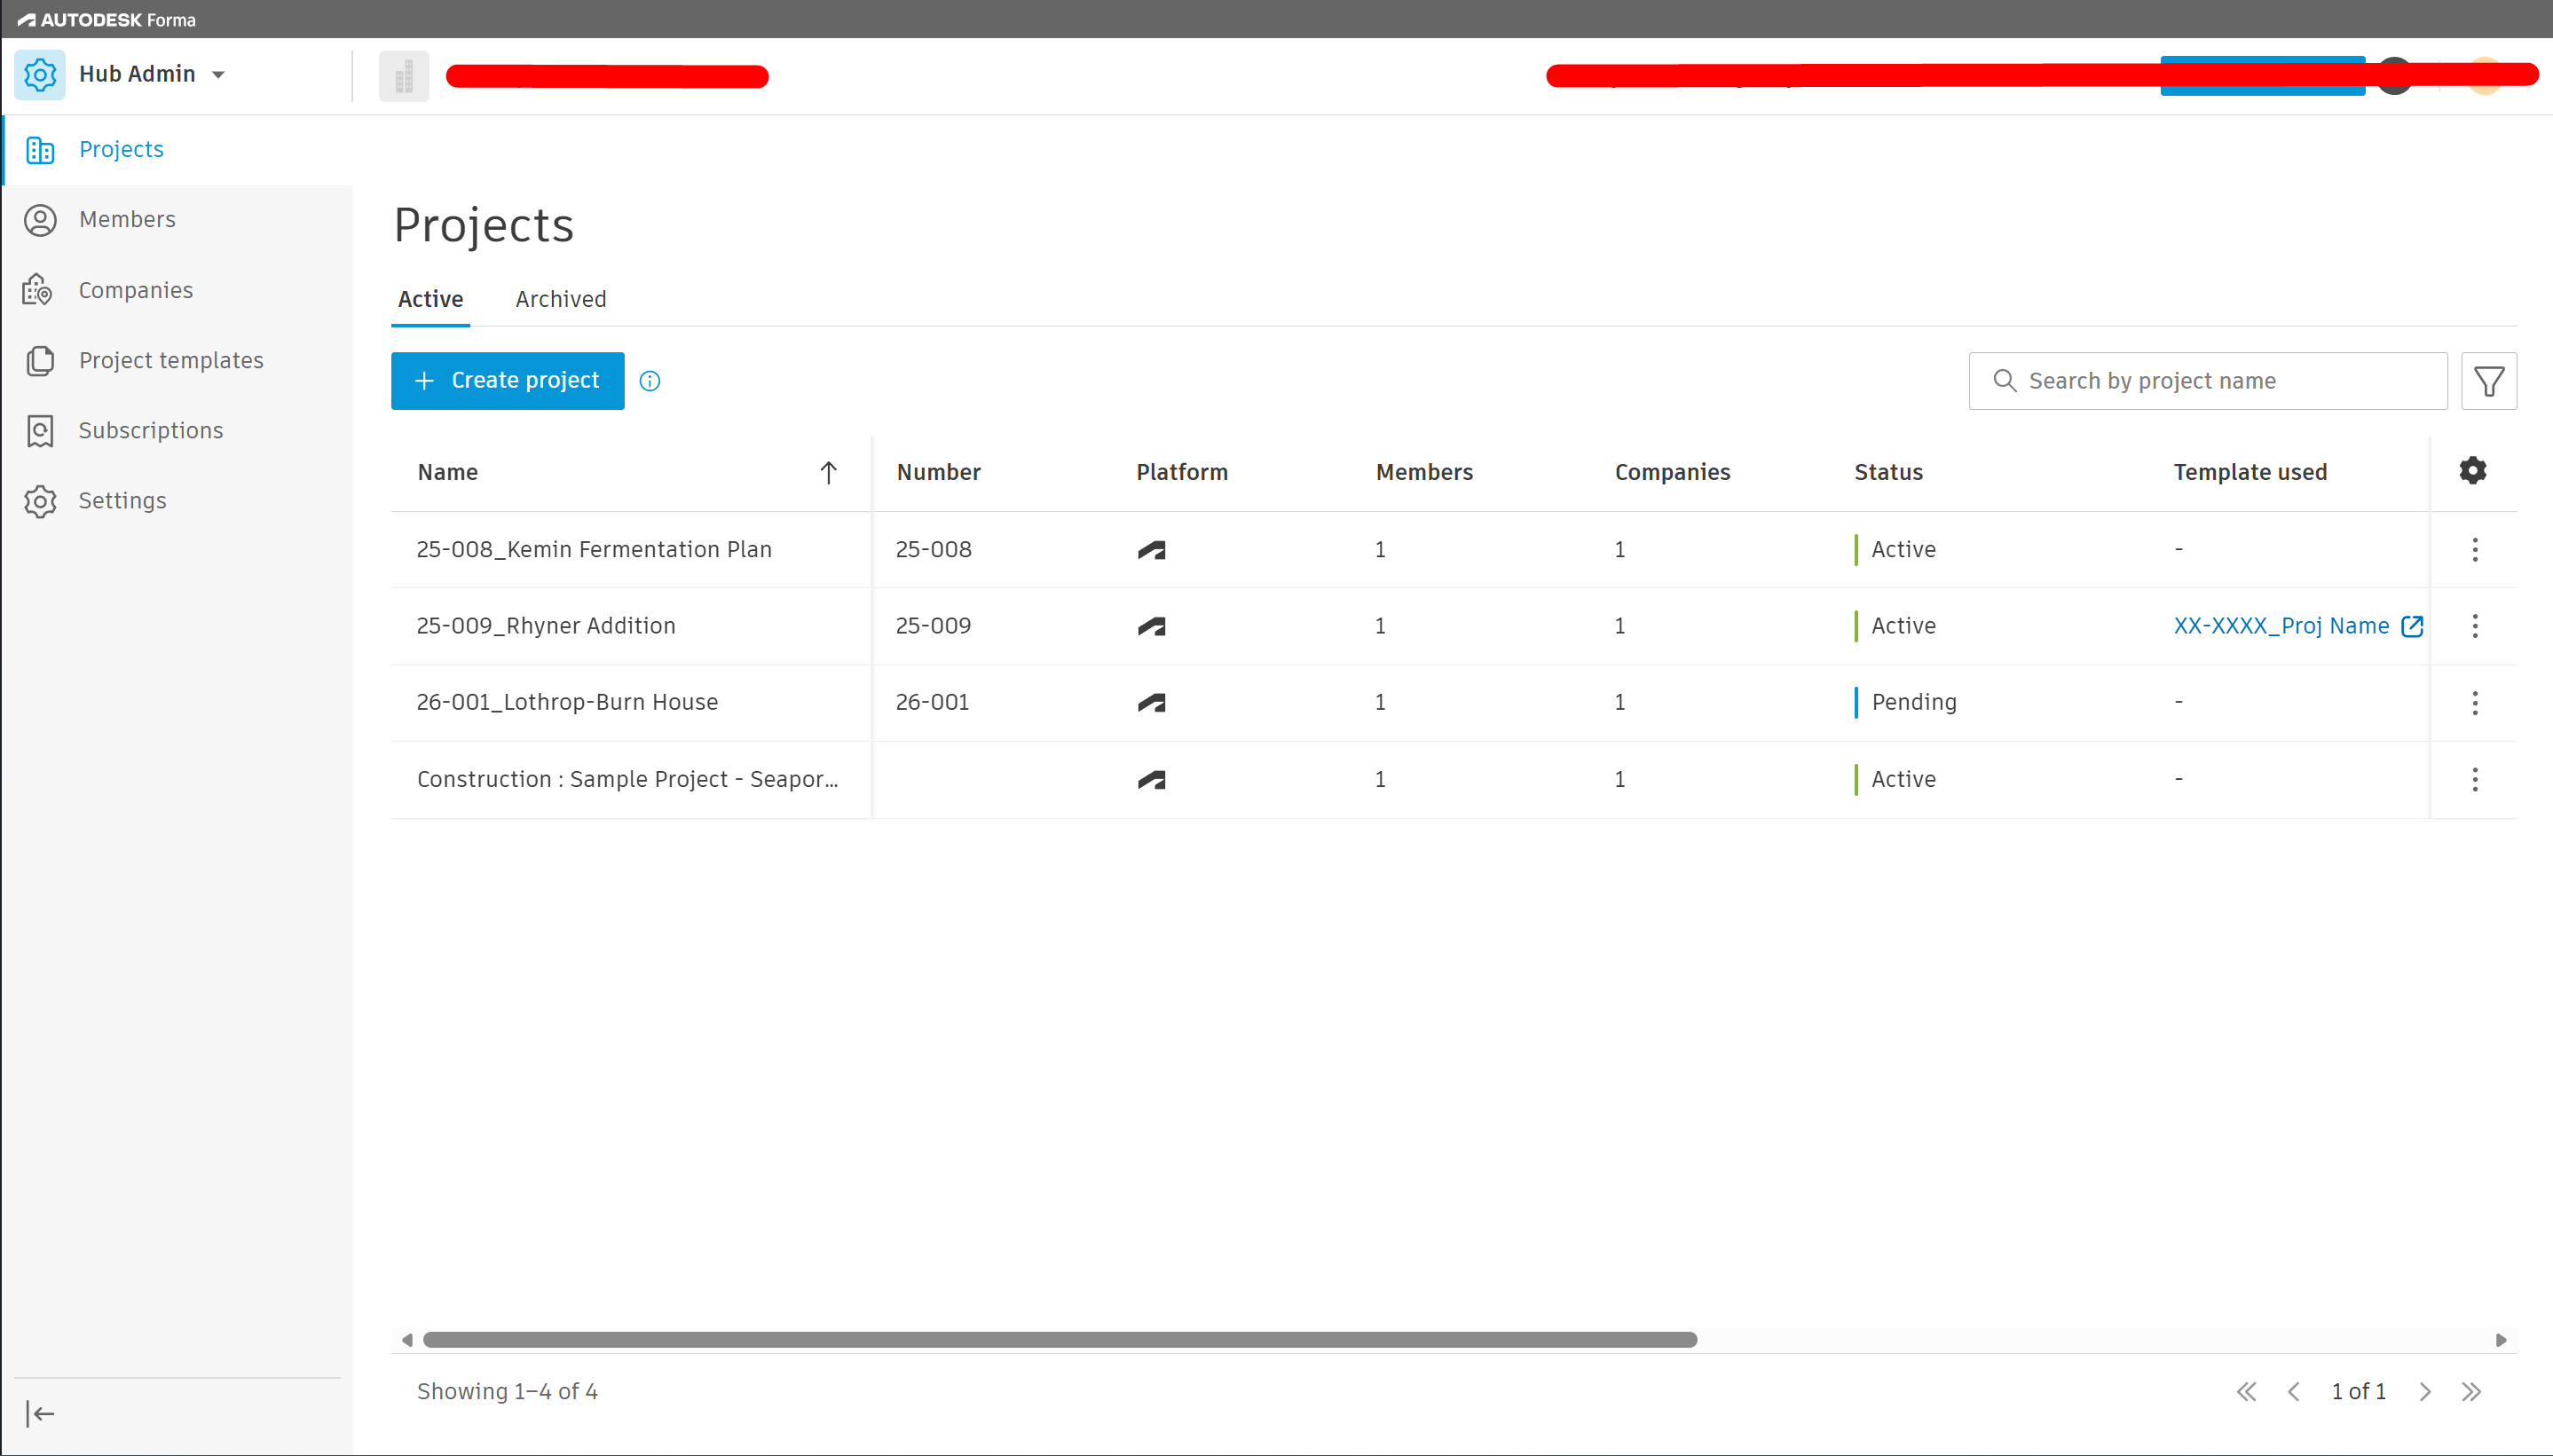
This step is important because Desktop Connector is not creating a standalone project folder out of nowhere. It is giving your desktop access to an existing Autodesk cloud project.
You still need the right project access and permissions. This workflow does not bypass Autodesk account access, project membership, or folder permissions.
Step 2: Make Sure Desktop Connector Is Installed and Running
Once Desktop Connector is installed and running, you should see the Autodesk Docs / Desktop Connector icon available from your Windows system tray.
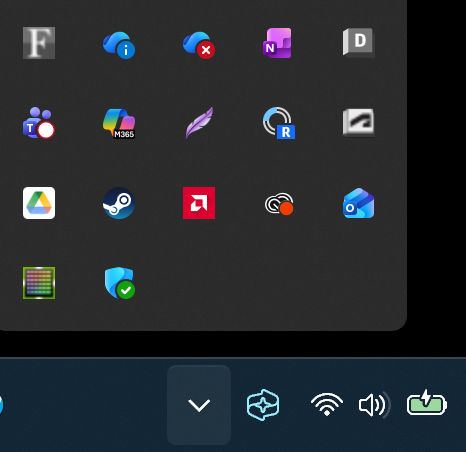
This is the bridge between your local desktop and the Autodesk cloud project.
If Desktop Connector is not installed, not signed in, paused, outdated, or not syncing correctly, this workflow will not behave reliably.
Step 3: Select the Projects You Want Available Locally
Open Desktop Connector and choose the projects you want available on your device.
Autodesk's current Desktop Connector documentation notes that users can add up to 80 Forma or Fusion projects to their connector in File Explorer. Once added, the connector replicates the project files folder structure locally.
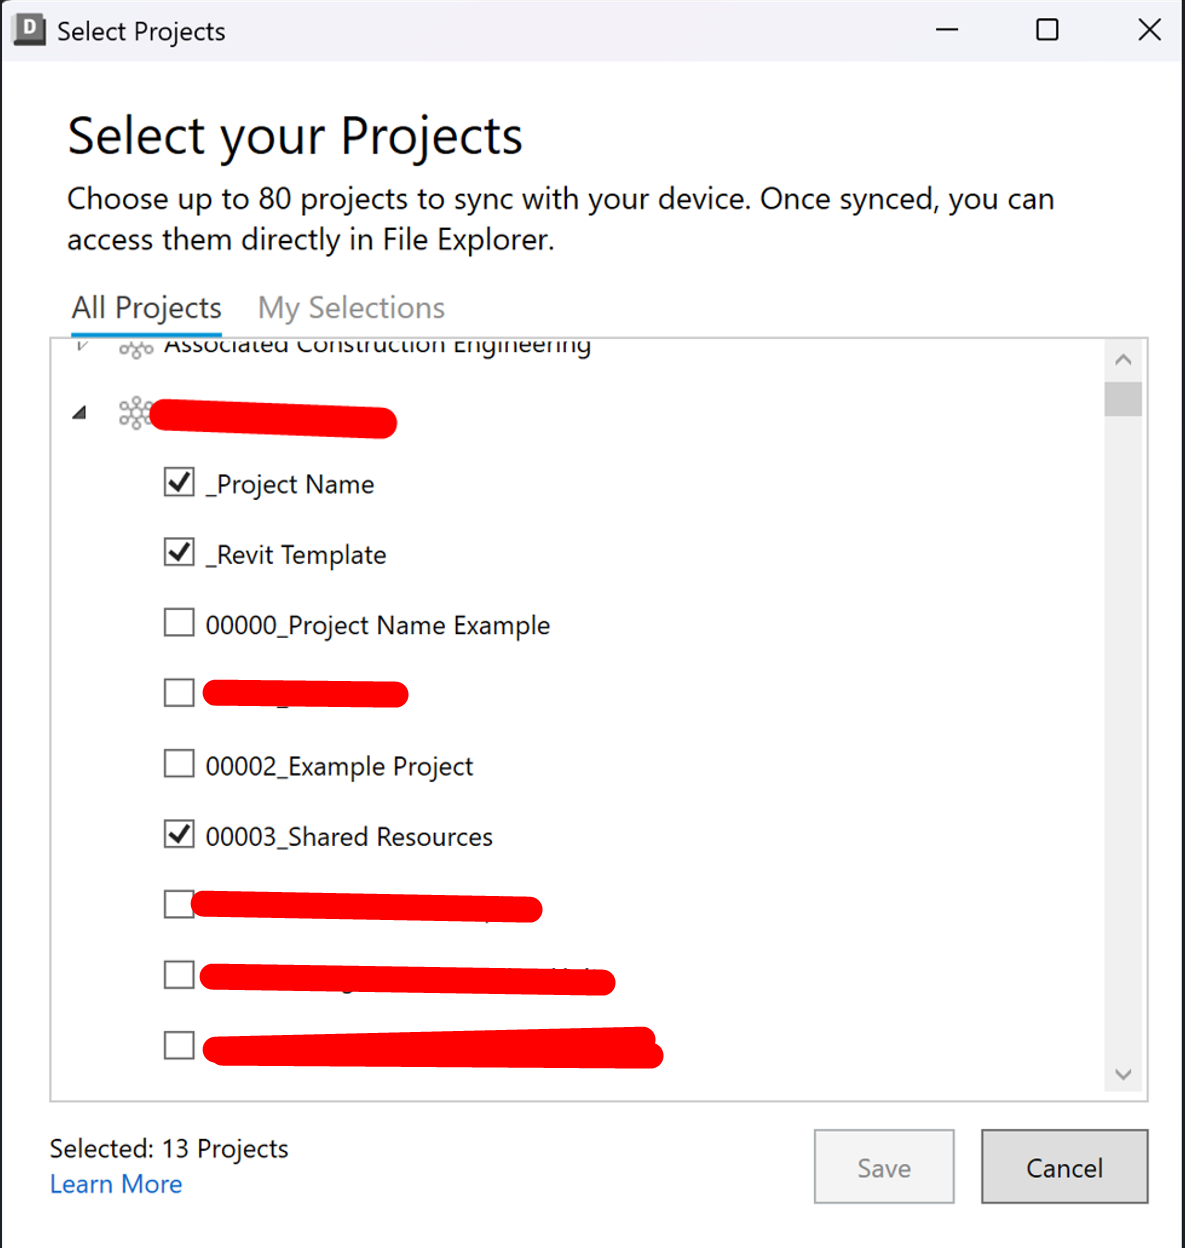
This is the key step that makes the workflow practical. Once the project is selected, you no longer have to download and re-upload files manually through a web browser for every exchange. The project folder becomes available through Windows File Explorer.
In the screenshot above, the project list shows multiple available projects and selected folders. Once saved, those selected projects will appear locally under Autodesk Docs.
Step 4: Open the Autodesk Docs Project Folder in Windows File Explorer
After the project is selected through Desktop Connector, it appears in Windows File Explorer under Autodesk Docs.
From there, you can navigate the folder structure like a normal project directory. For example:
Autodesk Docs › Project Name › Project Files › Architectural
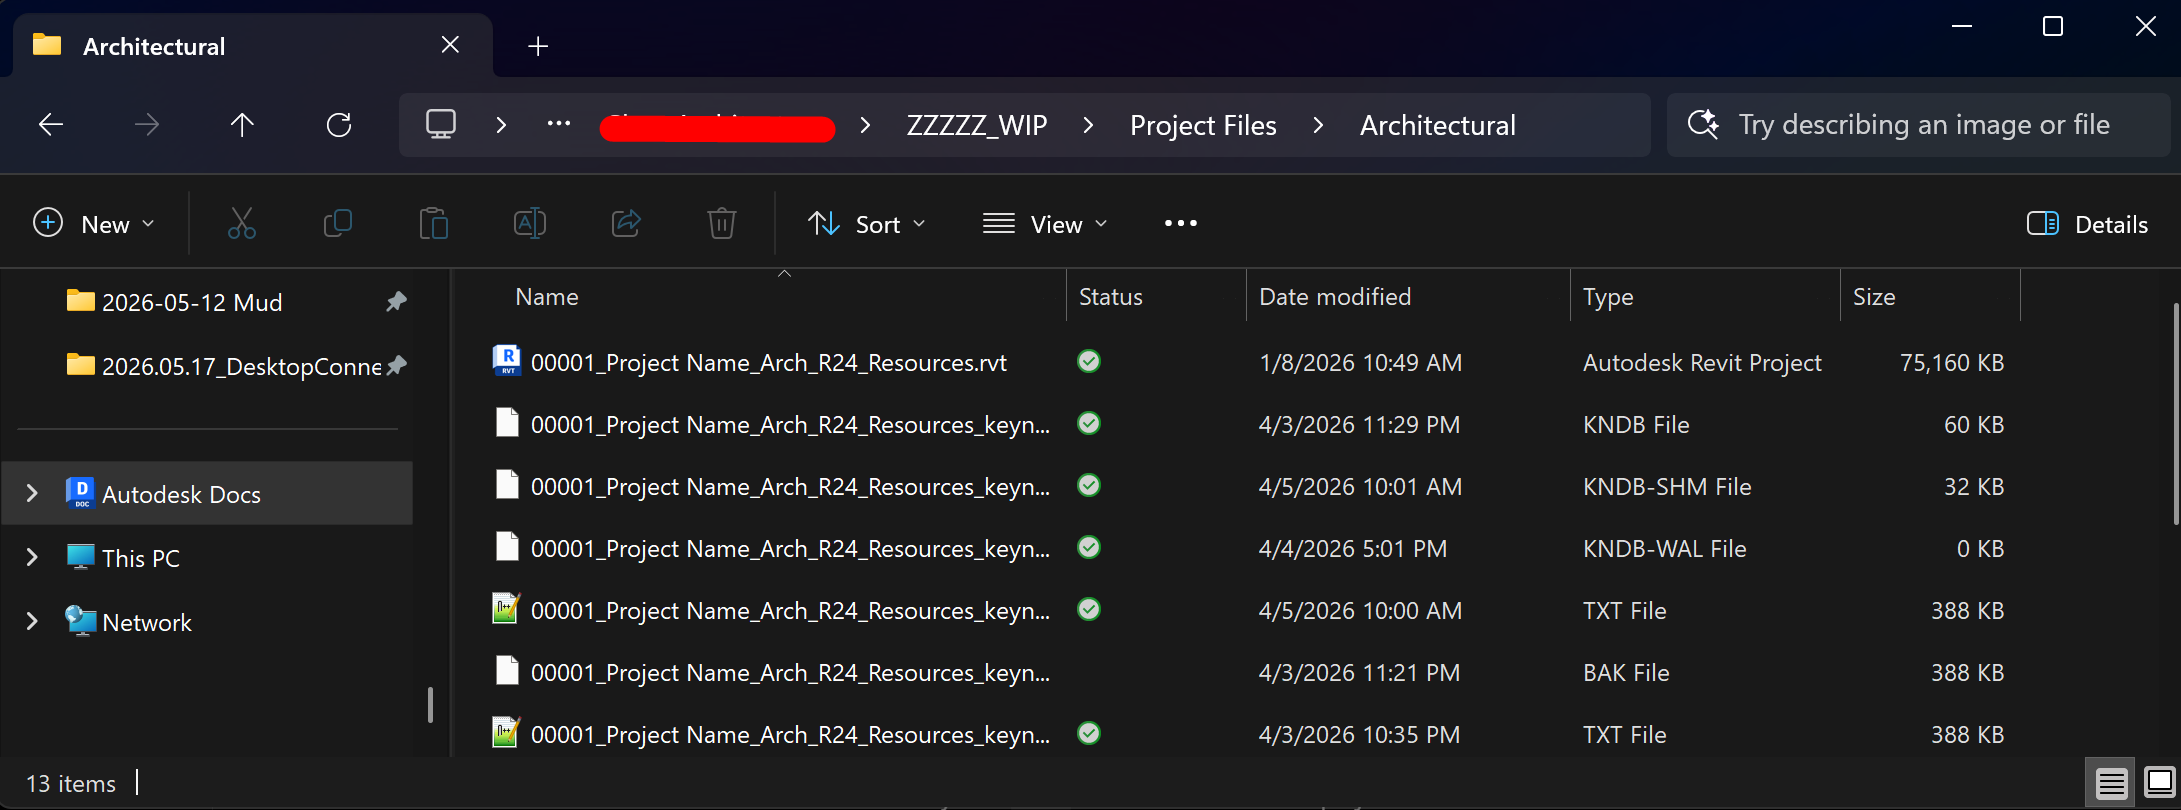
This screenshot is especially useful because it shows the real working condition: the Revit model and its supporting files are in the same cloud-connected project folder.
That matters for actual office workflows. Revit projects rarely consist of just one .rvt file. They often include keynote files, linked files, images, PDFs, exports, consultant backgrounds, and other project resources.
Step 5: Save the Revit File Into the Autodesk Docs Folder
Now create your Revit project as usual.
Then use Save As in Revit and browse to the Autodesk Docs folder made available through Desktop Connector.
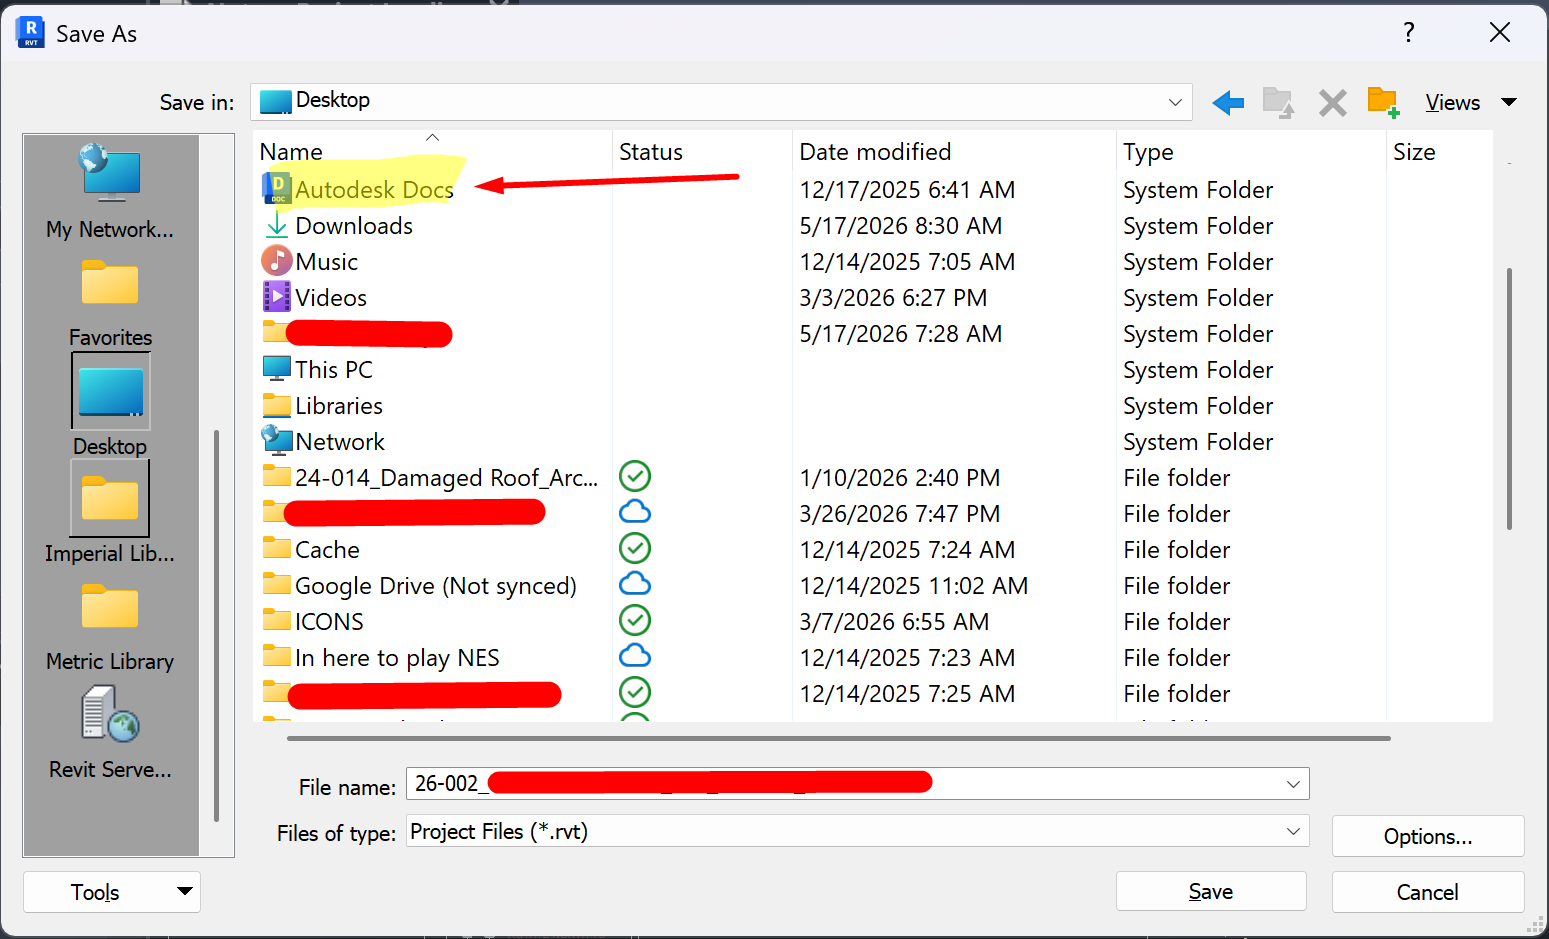
In this example, Autodesk Docs appears as an available location from the Revit Save As dialog. That is the moment where the workflow becomes clear: you are saving a standard Revit project file into a cloud-connected Autodesk project folder.
Once the file is saved, Desktop Connector syncs it back to the Autodesk cloud project. Other project members with permission can then access the file through Autodesk Docs or through their own Desktop Connector setup.
What This Workflow Is Good For
This workflow can work well when:
- One person is actively editing the Revit model
- The project is small or relatively simple
- Consultants need periodic access to the current Revit file
- The firm wants cloud-based file storage without setting up live Revit Cloud Worksharing
- The team understands that this is a shared-file workflow, not a central model workflow
For small architecture firms, this can be a very reasonable middle ground. You get a cloud-accessible Revit file without converting the model into a cloud workshared model.
What This Workflow Is Not Good For
This workflow is not appropriate when multiple Revit users need to work in the same model at the same time.
If your team needs true model co-authoring, worksets, live cloud synchronization, model publishing, package exchange, and formal coordination workflows, you should be using Autodesk's actual cloud collaboration tools. Autodesk's BIM Collaborate Pro / Forma Design Collaboration materials describe Revit Cloud Worksharing as the cloud-based co-authoring workflow for Revit teams.
Desktop Connector can help you share the file. It does not turn that file into a proper live cloud central model.
Important Limitations
It is not live-linked Revit collaboration
This is the biggest limitation.
A Revit file saved in Desktop Connector is not the same as a Revit Cloud Worksharing model. It is a file being synced through a cloud-connected folder.
That means this workflow is best when one person is responsible for editing the model.
It is better for sharing than co-authoring
Consultants can access the file, link it, download it, or coordinate against it.
But multiple people should not treat the same file like a central model unless the project is intentionally set up for proper Revit worksharing.
Desktop Connector has to be working
This workflow depends on Desktop Connector.
If Desktop Connector is paused, not signed in, failing to sync, or the selected project is not available locally, the workflow breaks down.
Some cloud collaboration features may not apply
Because this is not a true cloud workshared model, some Autodesk Forma / Docs / Design Collaboration features may not be available in the same way.
You are primarily using the cloud project as a file location.
Recommended Office Rules
To make this workflow safer, use a few simple standards.
Assign one model owner
One person should be responsible for editing and saving the active Revit model. Others can download, link, or reference it, but they should not be editing the same active file unless the team has a very clear process.
Use a clear folder structure
Keep the active model in a predictable location, such as:
Project Files › Architectural
Avoid burying the model several folders deep or keeping duplicate active copies in multiple locations.
Archive milestone copies
At major project milestones, save dated copies. For example:
ProjectName_ARCH_2026-05-17_SD.rvtProjectName_ARCH_2026-06-14_DD.rvtProjectName_ARCH_2026-07-12_Permit.rvt
This gives the team a recovery point if a sync issue, overwrite, or file confusion happens later.
Tell consultants what the file is
A simple coordination note can prevent confusion:
The Revit model is being shared through Autodesk Desktop Connector for consultant access. This is not a live cloud workshared model. Please download or link from the shared location as appropriate, and coordinate with the architect before editing or replacing files.
Avoid simultaneous editing
Do not have multiple people opening, editing, and saving the same Desktop Connector-hosted Revit file as if it were a central model. That is where this workflow can get risky.
Where Smart Tools Fits In
This matters because more Revit users are working in Desktop Connector folders every year.
Project files, PDFs, images, linked resources, keynote files, and reference documents are increasingly being stored in Autodesk cloud-connected folders instead of simple local directories.
That is why Smart Tools is being designed around real project workflows.
Every tool in the Smart Tools family is built to work the same regardless of where your project actually lives — local drive, network share, or Autodesk Docs project folder accessed through Desktop Connector:
- Smart Keynotes reads keynote files (.txt) from whatever path is set in Revit's keynote settings, including cloud-connected paths inside Autodesk Docs.
- Smart Crop saves cropped images and PDFs next to their source file, whether that source is on a local drive or in a Desktop Connector folder.
- Key Schedule Builder imports Excel spreadsheets from any reachable path, so a schedule built from a shared cloud spreadsheet behaves the same as one built from a local file.
- Material Eyedropper operates entirely inside the active Revit model, so wherever the project file lives is irrelevant to how the tool runs.
Desktop Connector support is not just a convenience feature. It is part of making Revit tools behave correctly in modern project environments.
Final Takeaway
You can use Desktop Connector to share a Revit project file through an Autodesk cloud project folder without setting up full Revit Cloud Worksharing.
That does not make it a replacement for Collaborate / Forma Design Collaboration. It simply gives small teams another practical option.
The cleanest way to think about it is this:
For smaller firms, one-person Revit models, and consultant-sharing workflows, that distinction can save time, reduce friction, and keep projects moving.