In this guide
1 What Smart Crop does
Reference images and PDFs — survey sheets, site photos, consultant drawings — almost always arrive bigger than the part you actually want on your sheet. Cropping them normally means a round trip to Photoshop or a PDF editor.
Smart Crop does it inside Revit. Pick a placed image or PDF, draw a crop region, and apply — Smart Crop produces the cropped result and keeps it in place. It's non-destructive: your original is preserved, placement and approximate scale are maintained, and every crop is tracked so you can reset or clean up later.
2 Installing & finding it in the ribbon
Smart Crop is free — no license key and no trial, and supports Revit 2025, 2026, and 2027.
- Download the installer from the Free Tools page.
- Close Revit, run the downloaded
.msi, and follow the prompts. - Re-open Revit and look for Smart Crop on the Add-Ins tab of the ribbon.
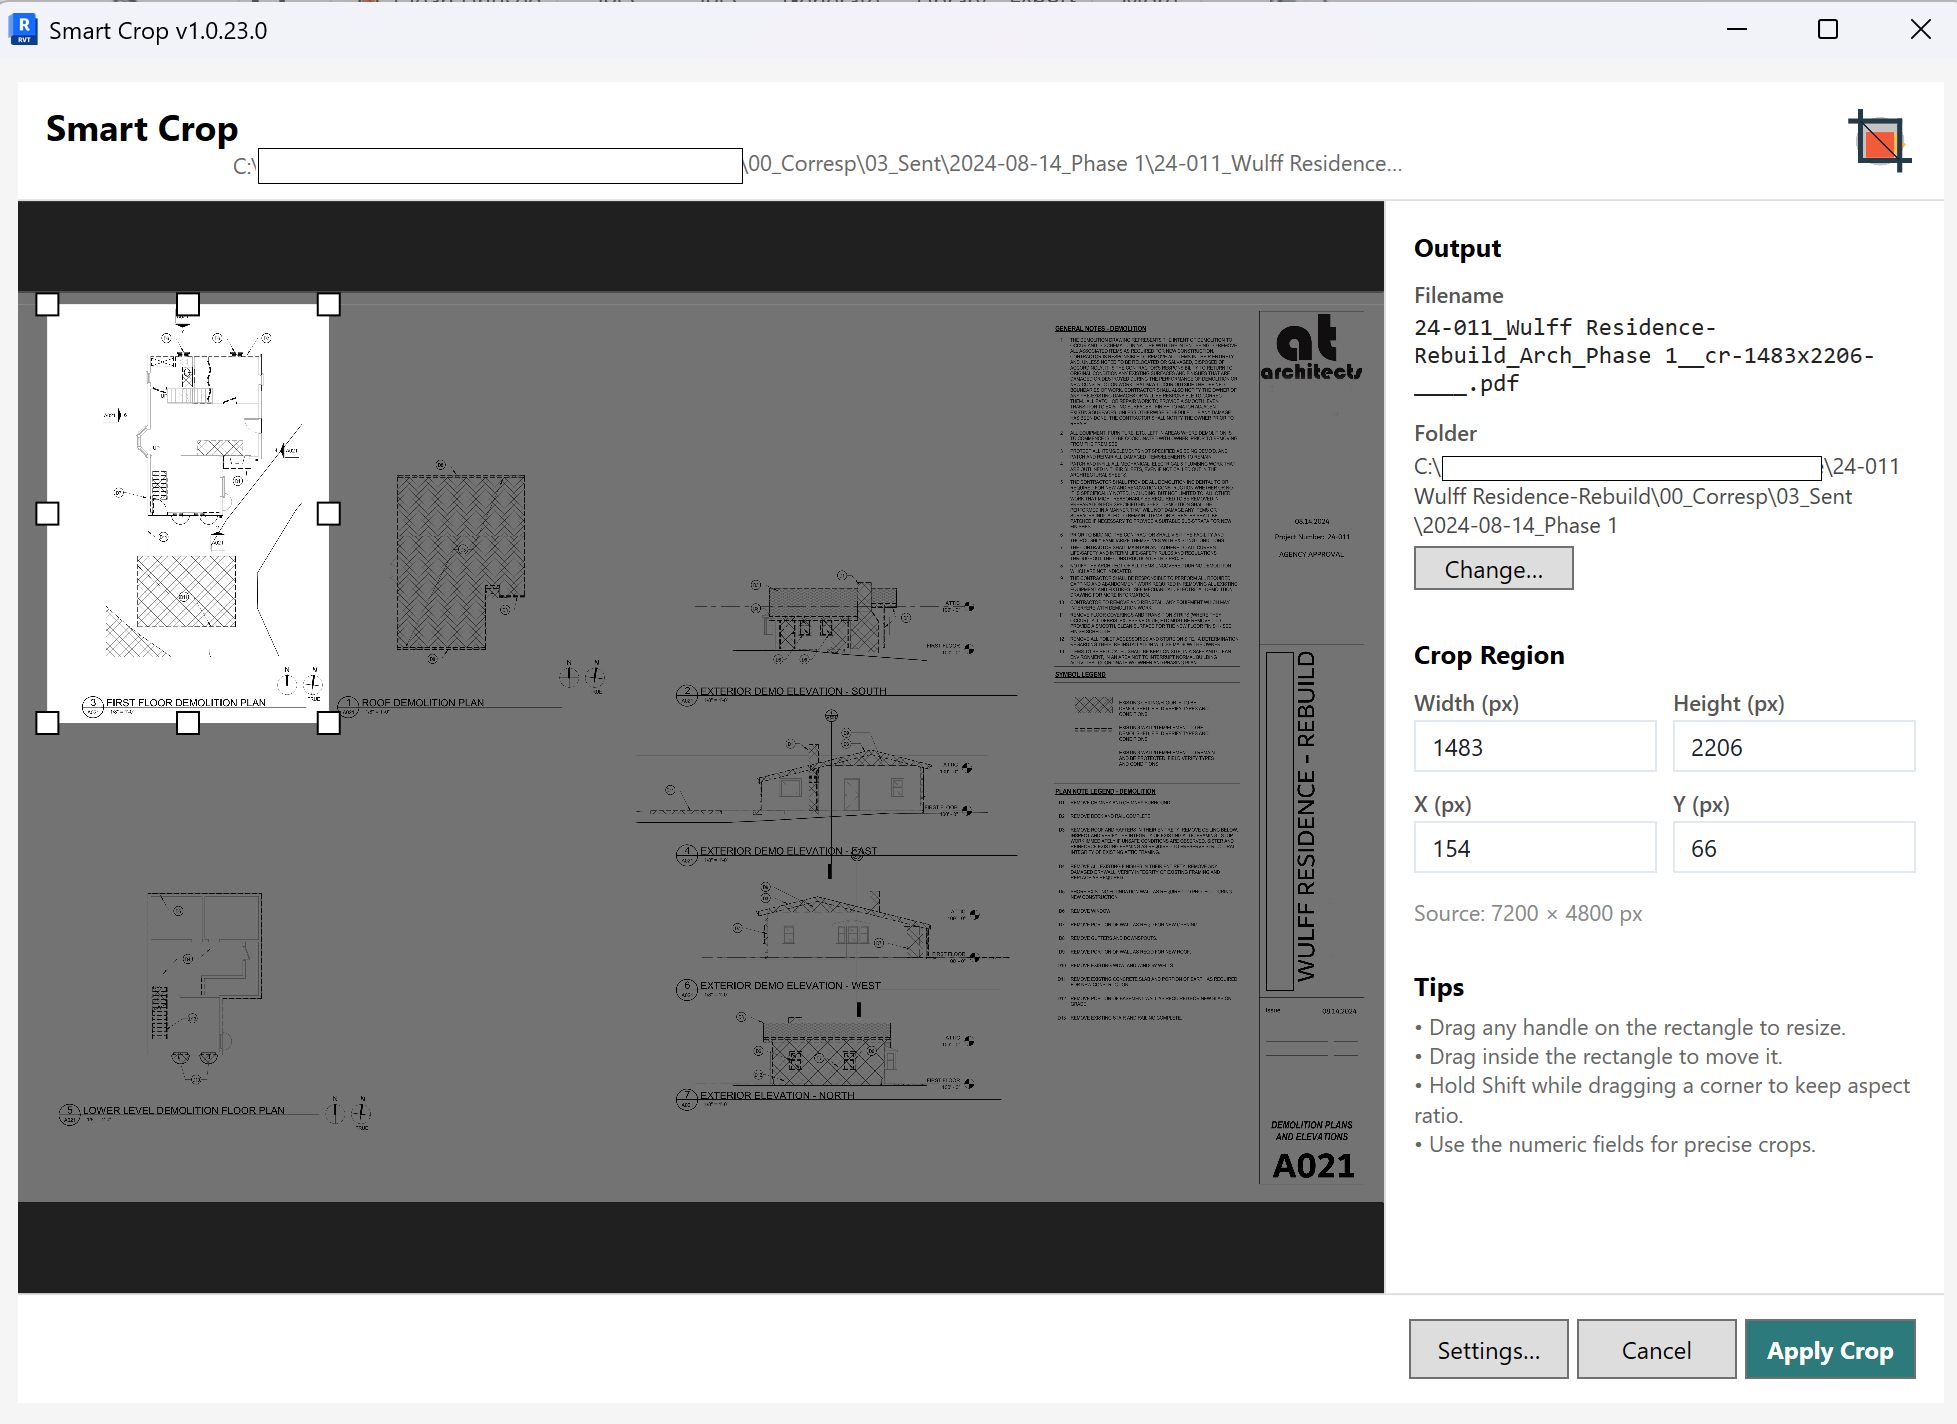
3 Cropping an image or PDF
- Select the placed image or PDF in your Revit view.
- On the Add-Ins tab, click Smart Crop. The Smart Crop window opens with a preview of the selected file.
- Set your crop region on the preview:
- Drag any handle on the rectangle to resize it.
- Drag inside the rectangle to move it.
- Under Output, check the Filename and choose where the cropped file is saved with Change… next to Folder.
- Click Apply Crop. Smart Crop creates the cropped result and keeps it positioned in your view.
…_cr-1483x2206…) so cropped versions are easy to tell apart from the originals.
4 Precise crops & aspect ratio
For exact crops, use the Crop Region fields instead of (or together with) dragging:
- Width and Height (px) — the size of the crop.
- X and Y (px) — the position of the crop's top-left corner.
- Source — shows the full pixel dimensions of the original, so you know the bounds you're working within.
To keep the crop's proportions while dragging, hold Shift as you drag a corner handle.
5 Non-destructive by design: reset & clean up
Smart Crop never overwrites your original file. Instead it produces the cropped version and keeps a record of what it did, which means:
- Your original is safe. The source image or PDF is left untouched.
- Placement is preserved. The cropped result stays where the original sat, at approximately the same scale.
- Crops are tracked. Because every crop is recorded, you can reset back toward the original or clean up the cropped files you no longer need later on.
6 Troubleshooting
The button isn't on the ribbon
Check the Add-Ins tab, and confirm you installed the build that matches your Revit version (2025, 2026, or 2027). If it's still missing, close Revit completely, re-run the installer, and re-open Revit.
Smart Crop didn't open with my file
Make sure a single placed image or PDF is selected in the view before you click Smart Crop.
The crop looks slightly off-scale
Smart Crop preserves approximate scale and placement. For drawings where exact scale is critical, verify against a known dimension after cropping.
I want the original back
Your original file is never overwritten. Because crops are tracked, you can reset toward the original and remove cropped files you no longer need.
7 Getting help
Questions or a feature request? We're glad to help.
- Visit the Support page.
- Email info@revit-smarttools.com.
You can also press F1 while hovering the Smart Crop button in Revit to return to this guide.
Explore the rest of the toolkit
Smart Crop is one of several free Smart Tools for Revit.
See all Free Tools