In this guide
1 What Key Schedule Builder does
A key schedule in Revit lets one "key" value drive a whole set of parameters — pick the key on an element and the rest of the fields fill in automatically. Building those keys by hand, row by row, is slow and error-prone.
Key Schedule Builder turns a spreadsheet into a finished Revit key schedule. You bring the data, map your columns to schedule fields, validate, preview the rows, and place the schedule — in a guided wizard that walks you through each step.
2 Installing & finding it in the ribbon
Key Schedule Builder is free — no license key and no trial.
- Download the installer from the Free Tools page.
- Close Revit, run the downloaded
.msi, and follow the prompts. - Re-open Revit and look for Key Schedule Builder on the Add-Ins tab of the ribbon.
3 The build workflow, step by step
Click Key Schedule Builder on the ribbon to open the wizard. A workflow rail on the left tracks where you are. The five steps are:
1. Setup
Choose the data you're importing and the kind of key schedule you want to build — the category it applies to and the name of the schedule. This is where you point the tool at your spreadsheet.
2. Parameter Mapping
Match each column from your spreadsheet to a parameter in the key schedule. Columns you don't need can be left unmapped. This is the heart of the tool: it's what lets a generic spreadsheet become a structured Revit schedule.
3. Validation
Key Schedule Builder checks your data before anything is written to the model — flagging things like duplicate keys, empty required fields, or values that don't fit the parameter type, so you can fix them up front.
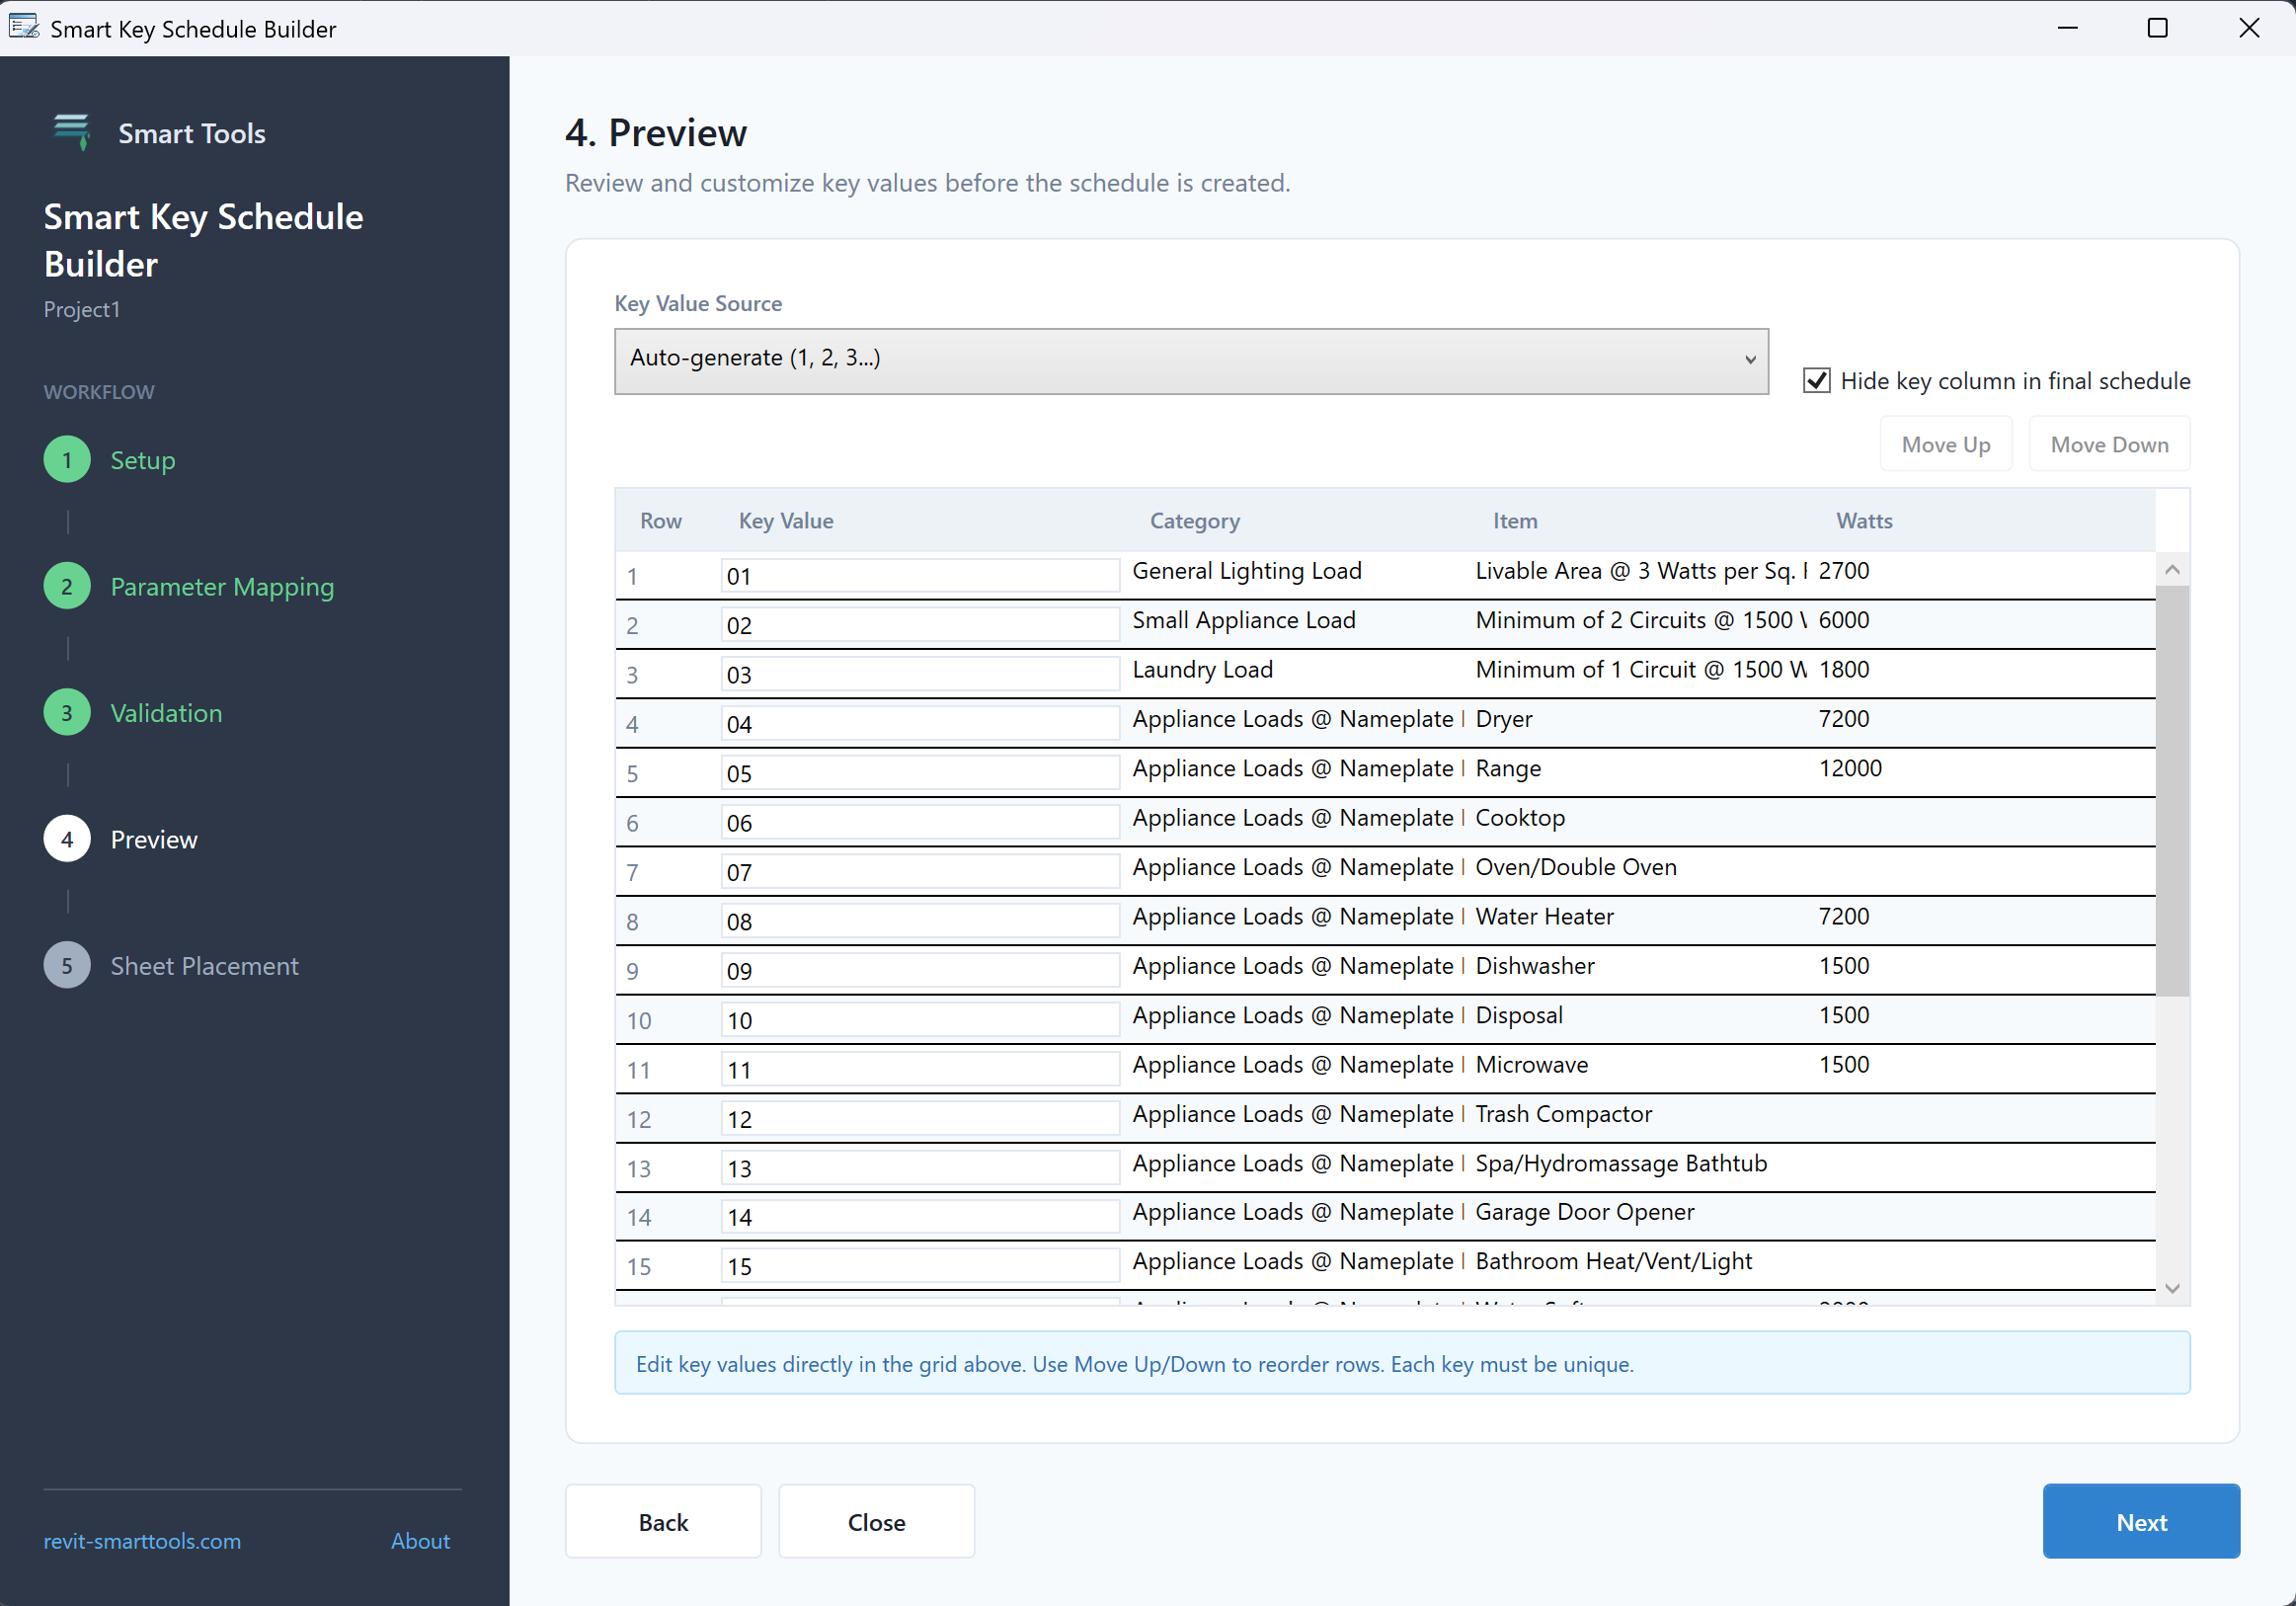
4. Preview
Review the finished rows in a grid before they're created. Here you can:
- Choose the Key Value Source — auto-generate sequential keys (1, 2, 3…) or use a column from your data.
- Edit key values directly in the grid. Each key must be unique.
- Reorder rows with Move Up / Move Down.
- Hide the key column in the final schedule if you don't want it shown.
5. Sheet Placement
Finally, place the new key schedule — optionally dropping it straight onto a sheet so it's ready to use.
4 Tips for clean imports
- One header row. Keep a single, clear header row so columns map cleanly.
- One row per key. Each spreadsheet row becomes one key value — and every key must be unique.
- Match types. Numeric parameters expect numbers, yes/no parameters expect yes/no values. The Validation step will catch mismatches, but tidy data sails through.
- Trim stray rows. Remove totals, blank separators, or notes from the bottom of the sheet before importing.
5 Troubleshooting
The button isn't on the ribbon
Check the Add-Ins tab. If it's still missing, close Revit completely, re-run the installer, and re-open Revit. Make sure the version you installed matches your Revit release.
Validation flagged duplicate keys
Each key value must be unique. Go back to your data (or edit directly in the Preview grid) so no two rows share the same key.
A column won't map
Confirm the parameter you're mapping to exists for the schedule's category and accepts the kind of value in that column (text, number, yes/no). Unmapped columns are simply ignored.
I want to change something after building
Run the tool again to build a fresh schedule, or edit the key schedule directly in Revit like any other schedule.
6 Getting help
Questions or a feature request? Reach us any time.
- Visit the Support page.
- Email info@revit-smarttools.com.
You can also press F1 while hovering the Key Schedule Builder button in Revit to return to this guide.
Explore the rest of the toolkit
Key Schedule Builder is one of several free Smart Tools for Revit.
See all Free Tools